Pigeons may seem harmless, but if you’ve ever dealt with them on your balcony, you know how much trouble they can cause. Droppings, feathers, nesting materials — all these can make your once-beautiful balcony unhygienic and unusable. That’s where pigeon safety nets come into play. These nets are a safe, effective, and affordable way to keep pigeons away without harming them.
If you’re wondering “how do I install pigeon safety nets for balcony?”, you’re in the right place. This blog will guide you through everything you need to know — from preparation to final installation, along with tips, tools, and FAQs.
Table of Contents
Why Install Pigeon Safety Nets?
Tools & Materials Needed
Steps to Install Pigeon Safety Nets
DIY vs Professional Installation
Safety Tips During Installation
Maintenance of Pigeon Safety Nets
Cost of Installation in Bangalore
Why Choose RS Balcony Safety Nets?
Frequently Asked Questions
1. Why Install Pigeon Safety Nets?
Before we get into how to install, let’s understand why installing pigeon nets is important:
Keeps your space hygienic: Pigeon droppings are not just dirty — they can carry diseases.
Prevents property damage: Their acidic droppings can stain tiles, grills, and paint.
Stops nesting issues: Once they start nesting, it’s harder to remove them.
Protects children and pets: Keeps your balcony safe and mess-free for all family members.
Increases usability: You can freely use your balcony for sitting, gardening, or drying clothes.
2. Tools & Materials Needed
Installing pigeon nets doesn’t require heavy machinery. Here’s a list of items you’ll need:
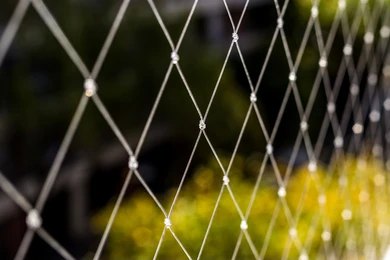
Pigeon safety net (HDPE or Nylon)
Drill machine
Hooks or screws
Tightening cords or cable ties
Ladder or stool
Measuring tape
Scissors or cutter
Marker/chalk
Gloves and safety gear (optional)
Tip: Choose a UV-stabilized pigeon net for durability, especially in sunny places like Bangalore.
3. Steps to Install Pigeon Safety Nets
Step 1: Measure the Area
Use a measuring tape to calculate the height and width of your balcony area where you need to install the net.
Note down the measurements carefully.
It’s always better to order a net slightly bigger than the required size.
Step 2: Purchase the Right Net
Choose a durable and weather-resistant pigeon net.
Look for features like UV protection, fire resistance, and non-toxic material.
Popular sizes are 1-inch to 1.5-inch mesh for pigeons.
Step 3: Mark the Hook Points
Using a marker or chalk, mark points where the hooks or screws will go.
Points should be evenly spaced — around every 1 to 1.5 feet for better tension.
Step 4: Drill Holes and Fix Hooks
Use a drill machine to create small holes at marked points.
Insert hooks or raw plugs with screws into the holes.
Make sure all hooks are firmly placed for safety.
Step 5: Tie the Net
Start from one corner and tie the net to the hook using a nylon cord or cable tie.
Continue around the entire balcony.
Pull the net tightly and evenly while fixing it.
Step 6: Trim the Extra Net
After securing the entire area, cut off the excess netting using scissors or a blade.
Avoid leaving loose ends — they may attract birds or create hazards.
Step 7: Final Check
Push and pull the net lightly to ensure it is tight and secure.
Make sure there are no gaps left between the balcony and the net.
If required, add more hooks or ties.
Congratulations! Your balcony is now protected from pigeons.
4. DIY vs Professional Installation
While DIY is possible, let’s compare it with professional services like RS Balcony Safety Nets in Bangalore.
Feature
DIY Installation
Professional Installation
Cost
Low
Slightly higher
Time Required
2–4 hours
30–60 minutes
Tools Needed
Must buy or borrow
All tools included
Quality & Finish
May vary
Professional, neat, and secure
Safety
May be risky without experience
Fully safe and trained workers
Guarantee
None
Yes, with warranty
Verdict: If you have time, tools, and basic skills — DIY is okay for small balconies. But for larger or high-rise buildings, hire professionals like RS Balcony Safety Nets.
5. Safety Tips During Installation
Whether you’re installing yourself or supervising a team, here are a few safety pointers:
Use a strong and stable ladder.
Do not lean out too far — stay inside the balcony grill.
Always wear shoes with grip to avoid slipping.
If your balcony is on a higher floor, use a safety harness or rope.
Work during daylight for better visibility.
6. Maintenance of Pigeon Safety Nets
Once installed, your job isn’t completely over. Here’s how to keep your net effective and clean:
Clean every 2–3 months with water to remove dust and droppings.
Use a mild soap solution and a soft brush.
Check for damaged areas once every 6 months.
Replace nets every 2 to 3 years, or sooner if they become loose or torn.
Avoid using sharp objects or hanging heavy items on the net.
7. Cost of Installation in Bangalore
In Bangalore, pigeon net installation cost is quite affordable, especially compared to the damage pigeons can cause. Here’s a rough breakdown:
DIY Material Cost:
Net: ₹6 to ₹15 per sq. ft.
Hooks, cords: ₹300–₹600 total
Tools (if not already available): ₹1000+
Professional Installation:
₹8 to ₹20 per sq. ft. (includes material, labor, and installation)
So, if your balcony is 100 sq. ft., the cost could range between ₹800–₹2000 with professional installation.
RS Balcony Safety Nets offers competitive pricing, quick service, and warranty-backed installation across Bangalore.
8. Why Choose RS Balcony Safety Nets?
If you’re in Bangalore and tired of pigeon problems, we at RS Balcony Safety Nets are here to help. Here’s why people trust us:
Fast & Easy Installation
High-Quality UV-Stabilized Nets
Trained Technicians
Affordable Prices
Free Site Inspection
Service Available in All Areas of Bangalore
Whether it’s a small balcony, open corridor, or a large apartment block, we customize our solution to fit your needs.
Call us today for a free quote or quick installation!
9. Frequently Asked Questions (FAQs)
Q1: Is pigeon netting safe for birds?
Yes. Pigeon nets don’t harm birds. They simply block access to your balcony, encouraging them to go elsewhere.
Q2: Can I remove the net later?
Yes, they are removable and can be reinstalled if needed. This is especially helpful in rental apartments.
Q3: How long do these nets last?
With proper care, nets can last between 3 to 5 years depending on the weather and usage.
Q4: Will it spoil the appearance of my balcony?
No. Modern pigeon nets are transparent or neutral in color and blend easily with your building’s look.
Q5: What if I live on a higher floor?
No worries. Our trained staff uses safety gear for high-rise buildings. The net will be installed without risking your safety.
Final Words
Pigeons may love your balcony, but that doesn’t mean you have to tolerate the mess. Installing pigeon safety nets is a smart, safe, and long-term solution to your bird problems. Whether you choose the DIY route or hire professionals like RS Balcony Safety Nets, the result is a cleaner, safer, and more enjoyable home environment.
So the next time you wonder, “how do I install pigeon safety nets for balcony?”, just remember this guide — or call the experts!